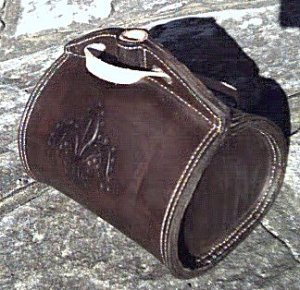
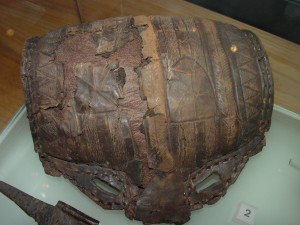
I was recently repairing a costrel of Mark Beabey manufacture and started thinking: leather bottels in collections, museums and exhibits around the UK are almost invariably decorated. Those used by re-enactors are mostly plain. I know the commercial manufacturers do this so the more generic item can be used in wider range of periods and hence appeal to the largest posisble market. It is also slightly quicker to make, but results in an impersonal product. On the other hand, the amateur/DIYer often seems to be daunted by the decoration, so avoids it. The result is yours looks much the same as everyone else’s.
I’ve already covered costrel manufacture in chapter 5 of The Reverend’s Big Book of Leather so I’ll show some different techniques and ways of doing the decorating and show some original examples instead of repeating too much.
The decoration, combined with the shape of the holes for the carying strap/cords can be very useful in dating the bottel, but be careful with the claimed country of origin. Some museums, including the V&A and therefore some authors will identify any item primarily decorated with the fleur de lys as being of French origin, regardless of find location, manufacturing techniques or that no similar item has ever been found, depicted or described in France.
I might quickly revisit forming then ends, as I’ve changed the way I do it since I wrote the BBoL. I’ve taken the way bases for bombards and jacks were made in the 19th century, changed it a bit so it would be unrecognisable to the people who used to do it but is quick and reliable and gives a really clean square edge. It isn’t necessarily correct or even the only way, the late Peter Lee used to start with flat ends, dampen them and mould with his fingers as he stitched. The only mechanical assistance Peter used was a broom handle to form the neck. Peter introduced me to leatherwork so in some small way is responsible for the crap I inflict on your computer screens, but I think my version is a lot more asthetically pleasing and more accurate.
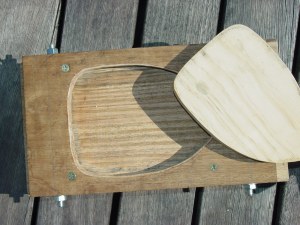
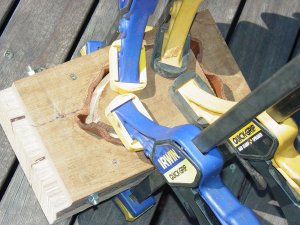
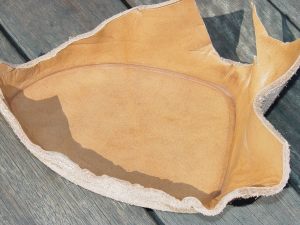
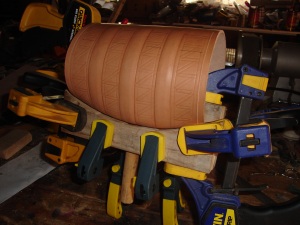
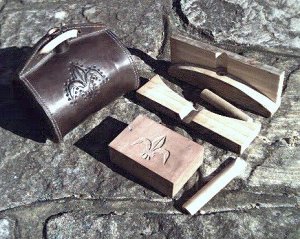
This is the jig I’ve made for shaping the ends. It has a 15mm thick board with the end shape cut out. It has a threaded rod top and bottom to prevent it splitting from the apex or base when I’m tightening the clamps. This board is screwed to a 40mm thick piece of Mountain Ash, which is heavy, stable when wet and resists bending. A piece of softwood cut 5mm smaller on all sides is the clamping piece. The leather is soaked, placed flesh side down on the moulding board and even clamped with the four bar clamps. After a couple of hours in the sun, the clamps are removed and the leather allowed to dry completely before removing from the mould and with the clamping piece still inside as a guide, trim the ends straight.
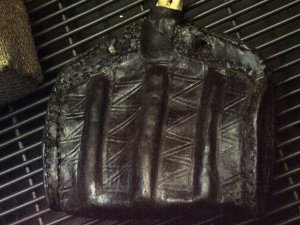
The medieval period examples extant and depicted in various works of art are decorated with usually three, but occasionally five perpendicular ridges. They are purely ornamental and only occur on one side of the botell, the bottom being flat. One ridge is always in the centre and flares out as it reaches the top to be the same width as the mouth. The others are parallel to the end seams and fade out about 25mm from the top seam. Costrels with bands invariably have elongated slots for leather carrying straps. Frequently foliate bands or heraldic shields are incised between the raised bands. Later examples have embossed decoration, again on one side only, the most common being a single large fleur-de-lys in the centre of the front. Pomegranates and Tudor roses also feature. These later bottels commonly have a round hole for the carrying cord.
The idea of an external mould came from a passage from p62 of Waterer’s Leather and the Warrior.
Ornament, usually of a fairly bold character, can also be incorporated in hollow moulds, being carved intaglio so that it stands out in relief on the surface of the finished article…
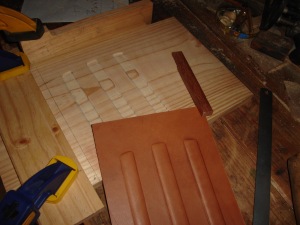
Making the jig and raising the ribs will only add an afternoon to your project, and then you’ll have the jig to make more costrels in the future. Mine’s made from a 300mm wide piece of pine, about 20mm thick. I’ve carved three grooves about 20mm wide and about 40mm apart with the requisite shape. Offset the outside ones to aproximate the curve at the top of the costrel.
The boards clamped on the left and top allow the leather to be positively located and embossed, without having to clamp and mark the leather. The leather was dampened (I want it to stretch in this case) and the bit of silky oak was used to push and stretch the leather into the grooves to form the ribs. Once dry, shields or foliage or any other decoration can be incised or stamped between the ribs.
Shaping the shoulders and neck using another home made jig. I’ve made five or six with this one, the grooves cut to allow the ribs to fit are unnecessary and leave unwanted marks on the leather. I’ll have to take them off before I make my next one.
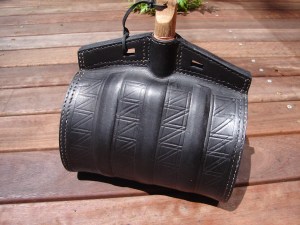
A copy of Mary Rose find 81A0081, the zig-zag decoration was made with two punches, one the width of the gap between the ridges and the other the length of the diagonal.
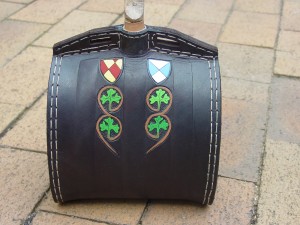
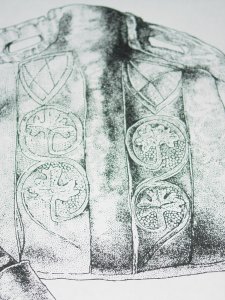
Inspired by Mary Rose 81A2034, the decoration is was copied by enlarging the picture from the dig report to 1:1 scale on a photocopier. Decoration is on both front and back, the small shield on the back has the letter “W” (really V V in 1545) and was carved from a piece of brass round stock. The “W” represents Mary’s monogram Virgo Virginium, and was commonly used for protection.
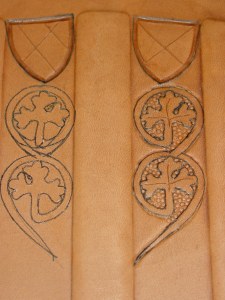
The embossing partially completed. The error on the top left vine leaf was corrected before the outline was cut. The ring decoration was done with a 3mm nail punch.
This one was preserved well enough for me to be able to copy the stitch holes as well. The unusual arrangement of the stitching either side of the neck is original. The stopper is a copy of the one associated in situ with this find. Evidence for painted decoration comes from find 82A5009 from nearby.
This third example is a scale model of a massive 6 gallon costrel used to collect wine tax from ships in the 16th century. My one holds a couple of litres, roughly half a gallon. The design for the decoration was carved in a block of grey gum and the leather forced in to the patern from behind. I left a vertical mark on the left side when clamping and got upset until I saw the original one had a similar mark in a similar location.
Here’s some examples of original costrels from museums and collections to give you some ideas.

Left hand end of the 15th C costrel in the MoL. The end piece has shed the corrium, so is half to aone third of it’s original thickness.
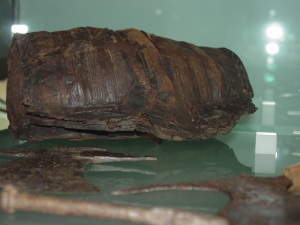
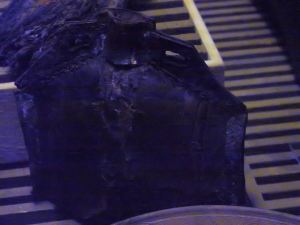
Top view of the 15th C costrel in the MoL. The neck has been crushed and I think the welts are missing but I have been known to be wrong before.
Links
Bunratty Castle: A late 17th century Costrel, or water carrier, leather. Initials B.H. cut into one end. http://www.bunrattycollection.com/search.php?i=146
Bunratty Castle: A late 17th century Costrel, or water carrier. Black leather, slight damage. www.bunrattycollection.com/search.php?i=138
Early 18th century Leather Costrel, punched decoration to the front. 8.5 inches in lenth 7 inches high. Sold recently by Keith Hockin Antiques – The Square – Stow-on-the-Wold – Gloucestershire – GL54 1AF http://www.keithhockin.com/popup.htm?database/images/costrel090309.jpg
Fourteenth century costrel in the Museum of London. This is the full record for the one in my photo above. http://www.museumoflondon.org.uk/English/EventsExhibitions/Permanent/medieval/objects/record.htm?type=object&id=309508
A nicely patched 17th c costrel is depicted on the 7 of spades on the Horner’s Playing Cards released by the Worshipful Company of Horners. Size: 21.5 x 19 cms. http://www.horners.org.uk/pages/Cards.html [dead link, 15/11/2014]
A nice pair of matched 18th century costrels are about a third of the way down the page at http://www.maineantiquedigest.com/stories/?id=1136 A 6″ high example that is dated 1730 and punch decorated in various places with the initials WM and WC, together with a miniature costrel believed to be of similar age.
References
Baker, O., Black Jacks and Leather Bottells, privately printed for W.J. Fieldhouse, Cheltenham 1921
Gardiner, J., Before the Mast – Lide and Death Aboard the Mary Rose, The Mary Rose Trust, 2005
Waterer, J., Leather in Life, Art and Industry, Faber and Faber, London, 1946
